How I Machine Applique

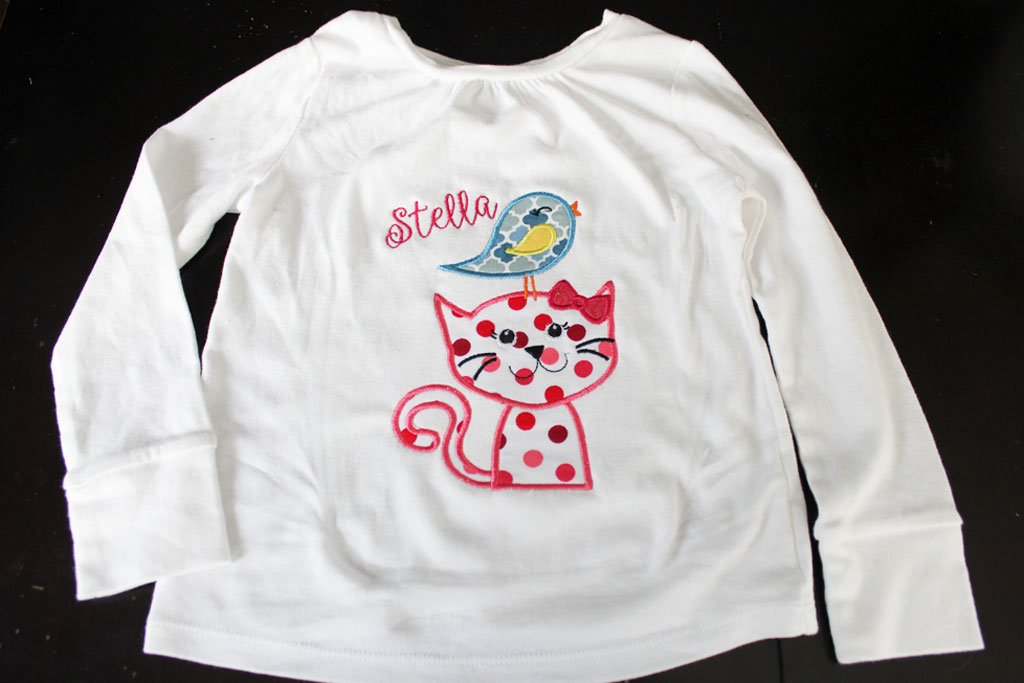
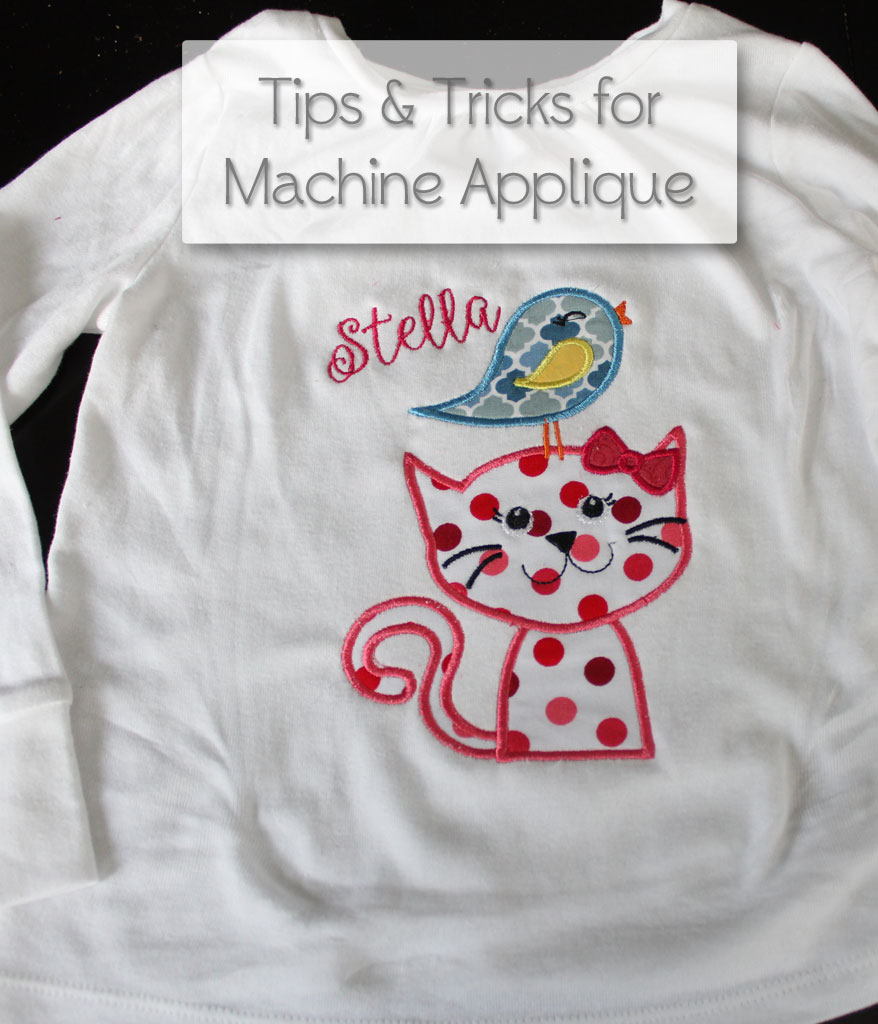
Alright, I promised last week when I showed off some of my crafty projects that I have done during maternity leave that I would write up a post on how I use my embroidery machine to applique. ANDDDDD I really meant to have this post done and up on Monday or Tuesday, but here it is on Thursday and I’m just posting… but that’s new motherhood for you!  And I will start this post out by saying I am a total novice at this, but after having the machine for 8 months, I’ve learned a few things and thought I would share for those of you who want to buy a machine or have one and want to know some of my tricks.  Here is the final product:
How to Machine Applique | www.amusingmj.com

First of all, lets talk about equipment.
How to Machine Applique | www.amusingmj.com

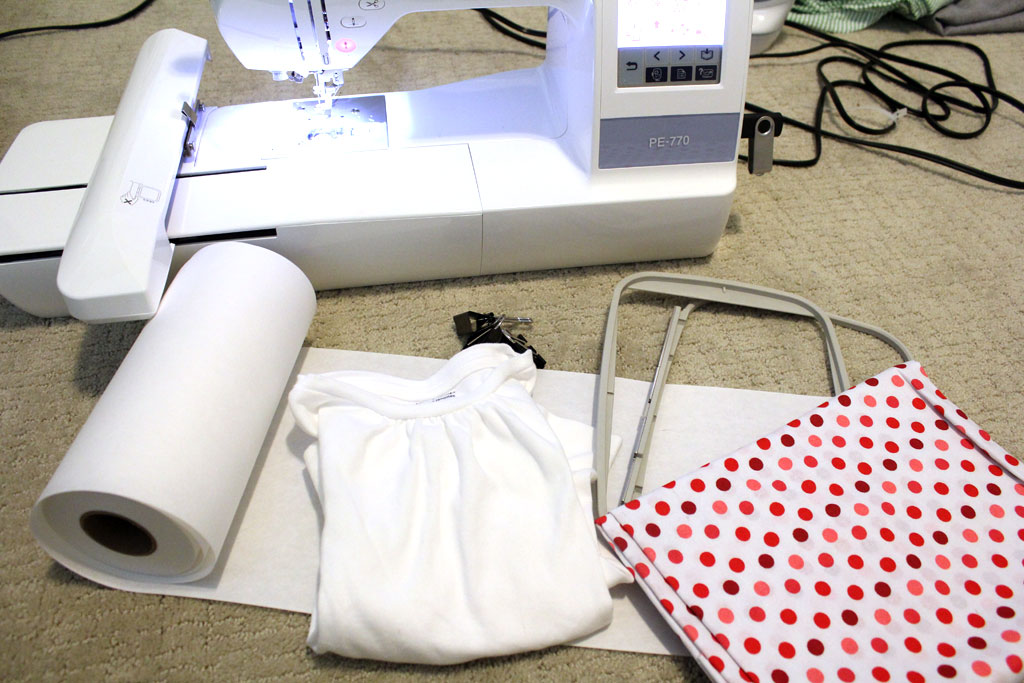
Here’s what you need:

  • An embroidery machine: I have a Brother PE 770 Embroidery Machine.
  • An embroidery hoop: my machine came with a 5×7 inch hoop (its the two piece gray thing in the picture above), but I also purchased a 4×4 hoop so that I can do smaller pieces as well
  • Stabilizer- I have two types: above is a roll of cut away medium duty stabilizer that is great for t-shirts and other lighter weight fabrics; I also have some tear away stabilizer (I actually bought mine at JoAnns, but the amazon link is something similar) that I use for things like embroidering the names on my burp cloths.
  • An applique embroidery design (I buy mine off of Etsy for $2-$5 a piece–see below for some of my favorite shops so far)
  • Fabric for the design–I am a hoarder so I typically save my fabric scraps, and applique is a great way to use up some of those smaller pieces!
  • Embroidery Thread– I bought this box of 100 colors when I first started and so far haven’t really needed to buy any additional thread.  There are definitely some ugly colors in the bunch, but I’ve been happy with the quality and it is nice to not have to think about which threads I need to buy for each project.
  • Basting spray or heat n’ bond– read below for more details on this
  • for embroidering t-shirts or onesies– medium binder clips
  • (optional) embroidery software– more details below

Finding a design: Etsy has been my go to place for buying designs/fonts etc.  If I’m looking for a particular thing, I just search Etsy as a whole, so for this project I wanted to find a design with a cat on it, so I searched around until I found this one that I liked.  But if I’m just looking for something fun to applique (or I’m just bored) I go to one of my favorite shops and search their designs.  Here are some of my favorite shops

  • Rivermill Embroidery— So far their fonts, monograms and designs have all been very high quality– on this shirts I showed you in this post I used the chachi font, their turtle and their lady bug.
  • Applique Cafe Designs— I’ve used their Dinosaur design, but I have plans to use several more of their super cute designs!
  • Monogram Font Store–I love the fonts they have and have used several on lots of projects!
  • Ballerina Script by Hoop Mama Embroidery–This is the font I used for this project to add Stella’s name.

And that brings me to my next point.  Software: If all you ever want to do is pre-made designs, you don’t need any software. BUT, the whole point for me of getting an embroidery machine was to be able to add monograms and personalized things to my projects, so I wanted to be able to add letters, names, etc.  Software is the easiest way to do that.  I searched around for a while and settled on Embird software, mostly because it was cheap.  I think it was about $150 (some embroidery software programs are in the 1,000s of dollars… no thank you.) Again, I’m not creating my own files or doing anything fancy… I just wanted to be able to lay out my designs with letters.  So for every project that I want to personalize, I open up my software and lay it out. So for this project I downloaded the cat file that I picked out from Etsy, and then in Embird I merged it with the Ballerina font 1″ letters that spelled out Stella.  From there I saved the file to a USB drive and loaded it into my machine.  Each machine is different… but read your instructions on how to import a file from USB.

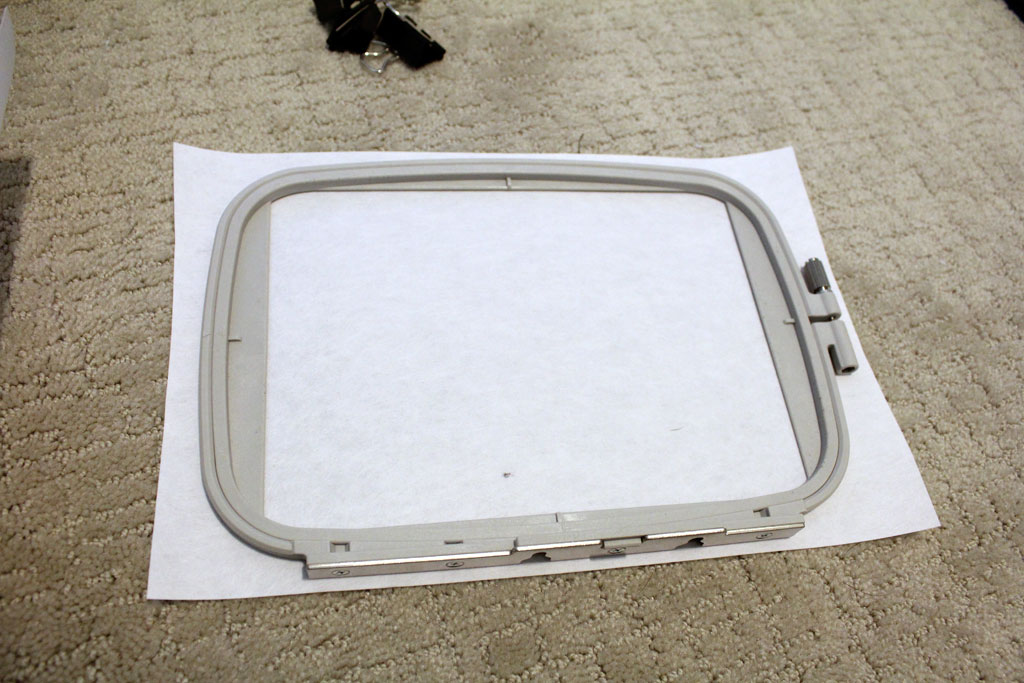
The first step in applique is then to hoop your fabric and stabilizer.  I cut out a piece of stabilizer larger than my hoop:
applique1

Then I center the hoop and stabilizer onto my fabric.  In this case I put it onto a Playtime Favorites T-shirt from Gap Kids (bought at 40% off).

I find centering and hooping my fabric to be the hardest part of machine applique: you want to make sure that your fabric is smooth and tight and that your hoop is straight and centered on the shirt. (a very hard task for a non-perfectionist like me!)  applique8
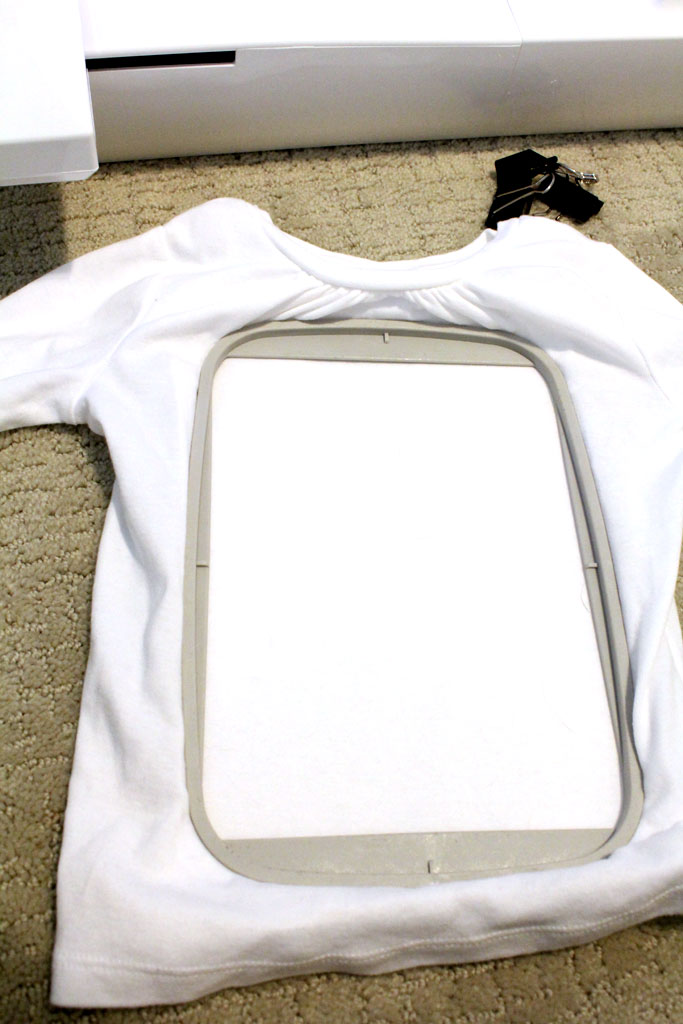
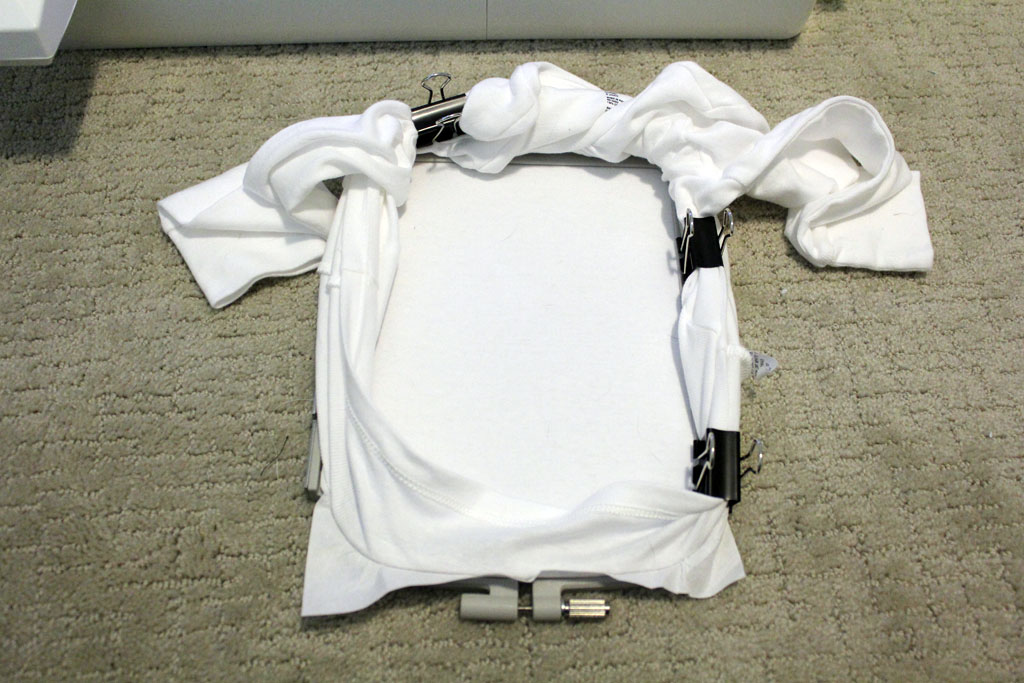
Because you obviously don’t want the machine to stitch through both the back and the front of the shirt, I use a trick I found on this video on YouTube— I use binder clips to clip the rest of the shirt to the outside of my hoop.  You have to be careful that they won’t get in the way of the needle, but it works really well to keep your fabric bunched on the outside.
applique4

Most applique designs come with an order list of stitches so that you know which part comes next, so I print this if it came with one.

Usually each different part has 3 steps: the first is the outline so you know where to put your fabric:
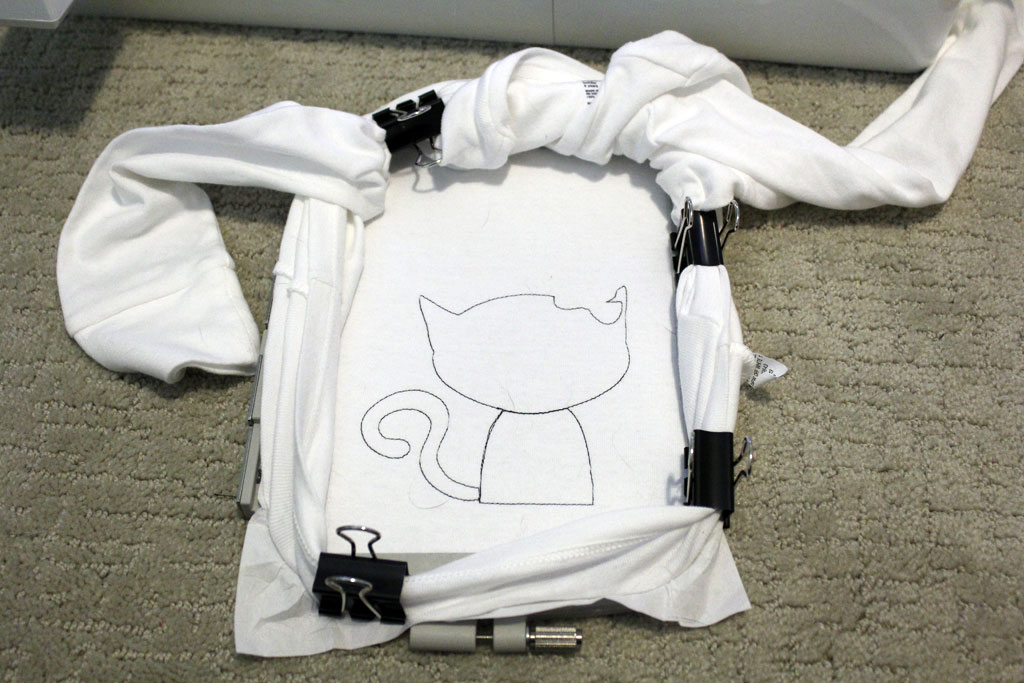
How to Machine Applique | www.amusingmj.com

Then you lay your fabric down on top.  This is the step where you should use either basting spray or heat ‘n bond lite.  I typically use basting spray because I’m lazy and it is faster. But if you are doing a large section that won’t have any detailing and you don’t want it bubbling up at all from your t-shirt– you should use the heat ‘n bond lite  (if you want details on how to do that google or search for that on pinterest and you’ll get some good tutorials).

So I spray my fabric that is larger than the stitched area with basting spray (its the purple and white can in the photo below) and then stick my fabric over the design.
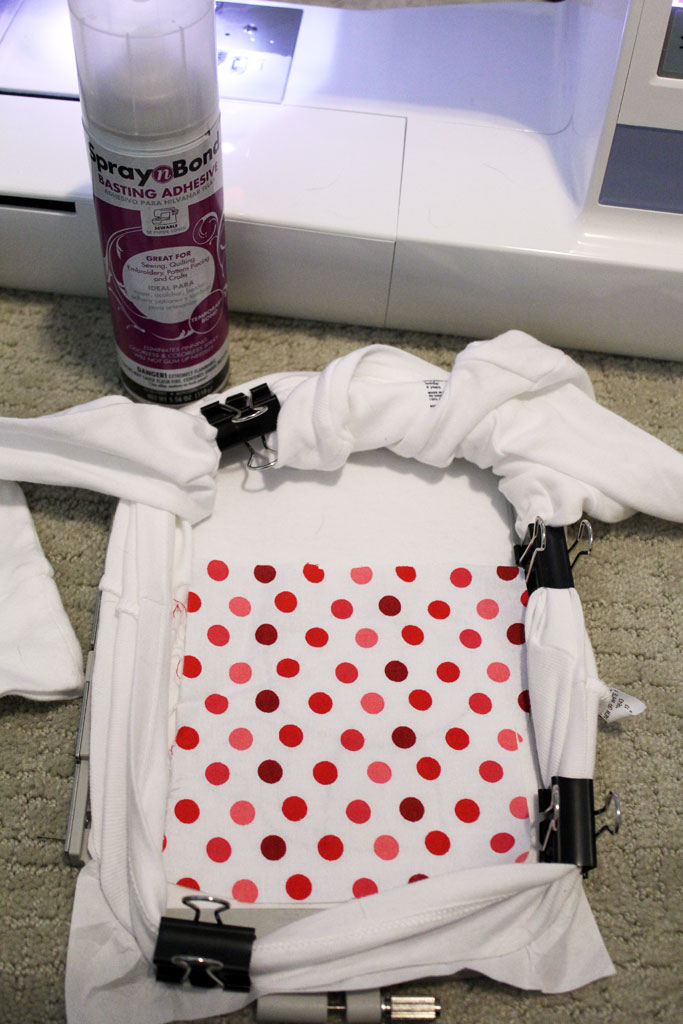
How to Machine Applique | www.amusingmj.com

Next put the hoop back into the machine and let it do the ‘tackdown stitch’ (not all of them are zigzags… this design just happened to be).
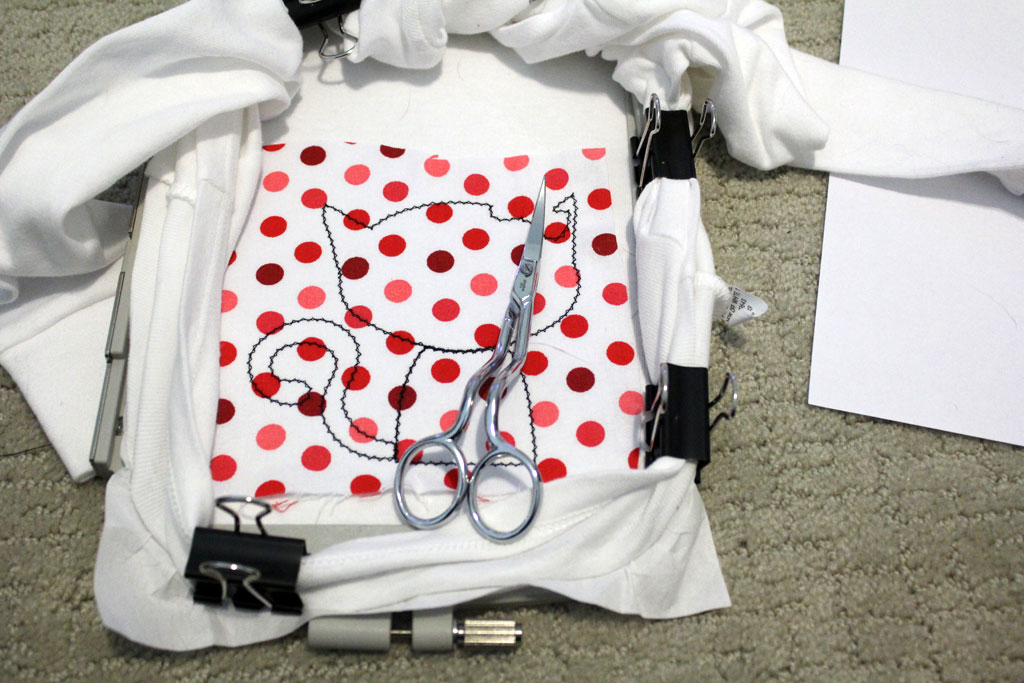
applique5

Now cut around the design as close as possible to the stitching.  I HIGHLY recommend a pair of embroidery scissors because you can get a LOT closer to the design and they are easier to use.  These are the ones I have. I find it easiest to pull up on the loose fabric to make it tight enough to get in closer to the stitching.
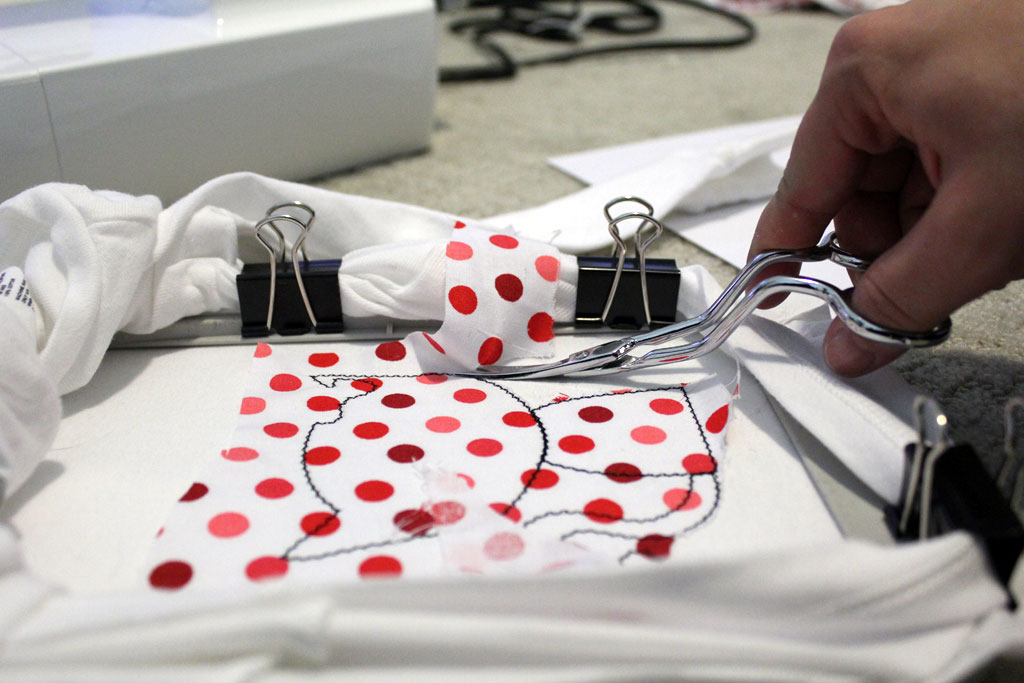
applique7

So here is what mine looks like with all the fabric on, but before the satin stitches.
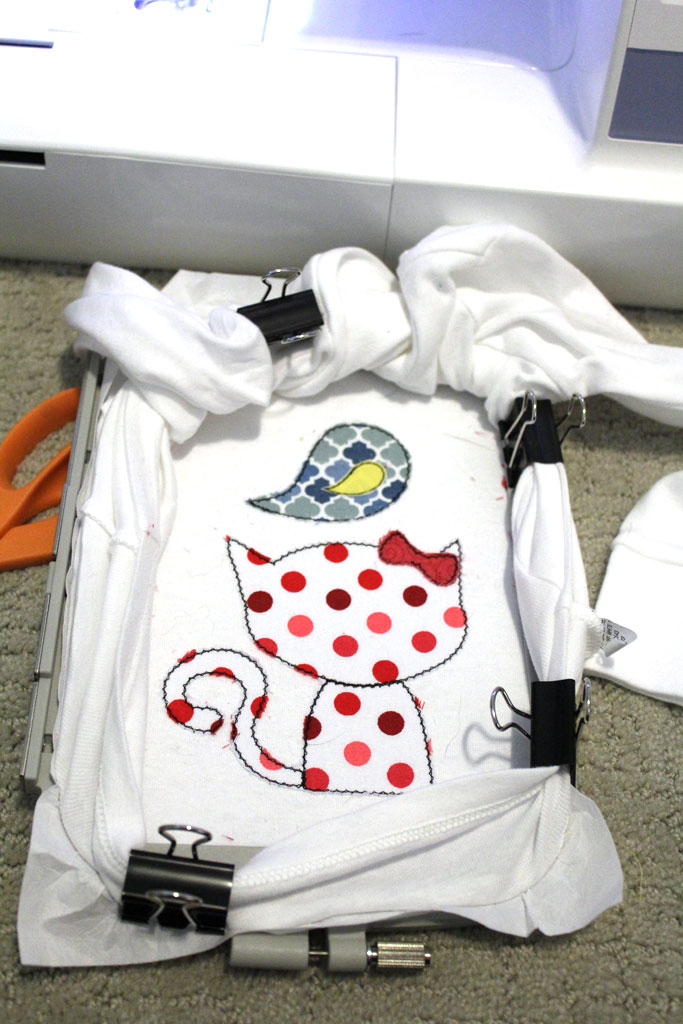
How to Machine Applique | www.amusingmj.com

And then you just follow the stitch order, swapping out your thread colors in between each step. So here is my final product before I take it off the hoop and trim all of my threads.
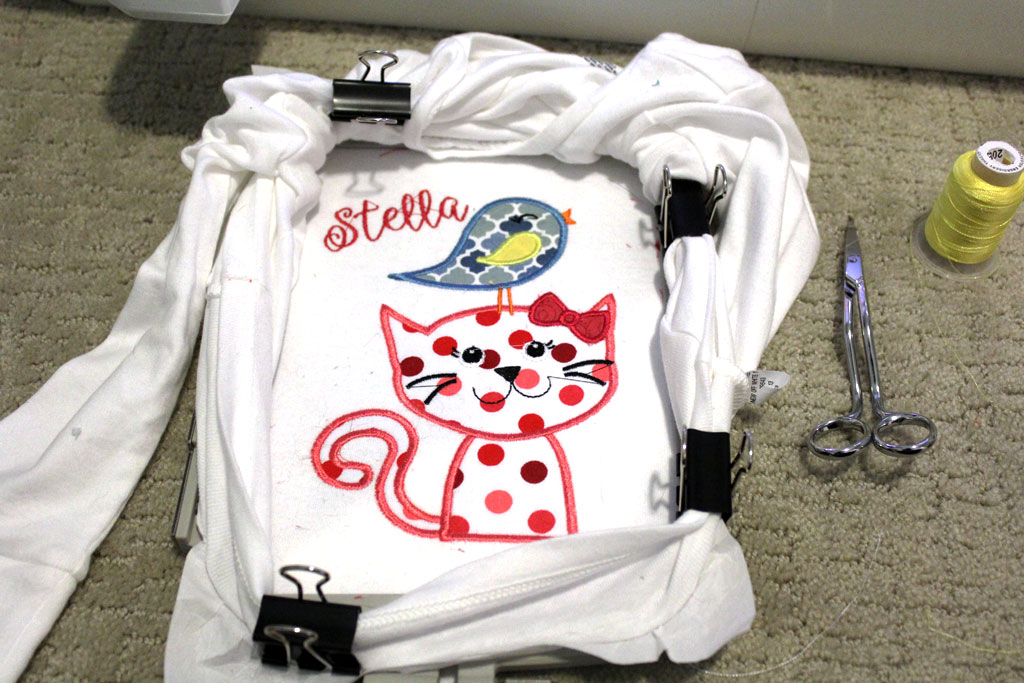
applique3

The last step is to trim the stabilizer from the back.  It will soften after a few washes, but I try to trim as much as I can away without cutting the shirt or my design!
Tips & Tricks for Machine Applique | www.amusingmj.com

And then you are done! A super cute, personalized gift!


Applique T-Shirts

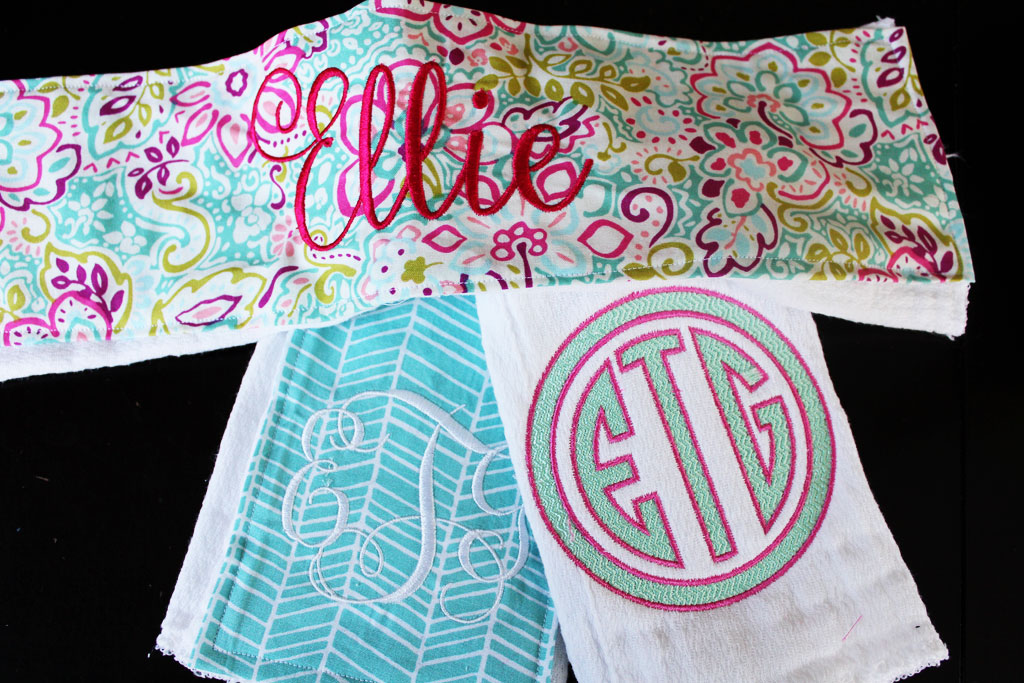
While I’ve been on maternity leave, mostly I’ve been soaking up time with Taylor, but I’ve also managed to squeeze in a few craft projects.  I shared the burp cloths I made for Miss Taylor, but I also made a set for my good friend Lauren’s little girl Ellie… and even embroidered them with her name/monogram (Because who doesn’t love a good monogram)!

DIY Burp Cloths | www.amusingmj.com

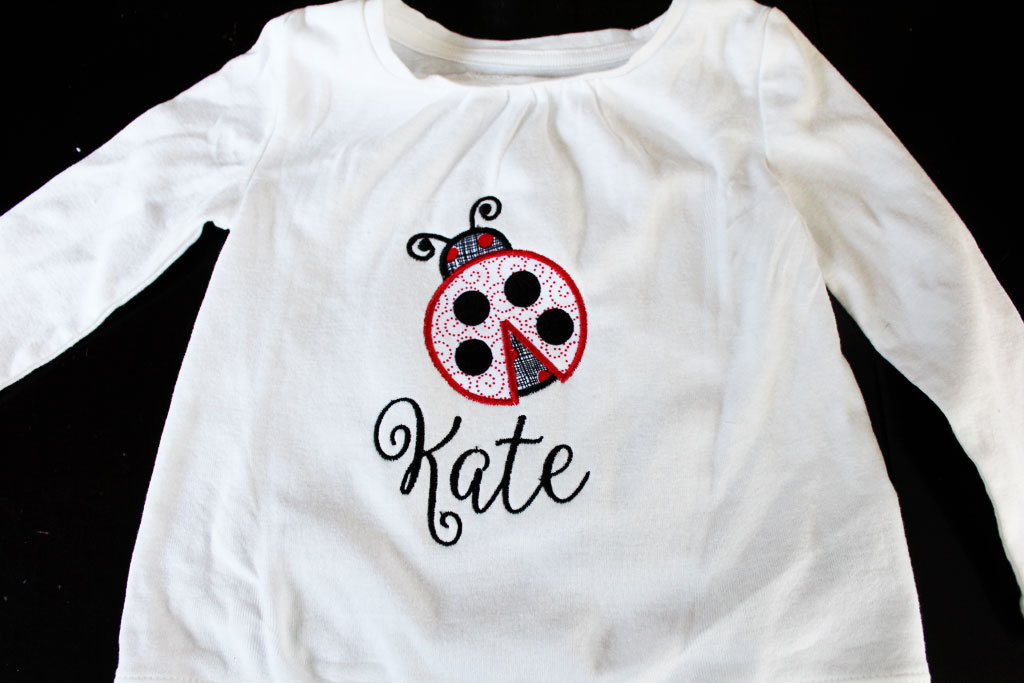
But because I believe that older siblings shouldn’t be left out during the new baby process, I decided her older sister Kate needed her own shirt.  So I got onto Etsy and found a few Applique designs I liked and settled on a Ladybug for Miss Kate. (I used this one from Rivermill Embroidery… and so far all my purchases from this shop have been awesome!)  Next week I’ll post about how I do the applique on my embroidery machine, but I wanted to go ahead and show you my results! (Update: I blogged about my tips and tricks here)

Machine Applique T-shirt | www.amusingmj.com

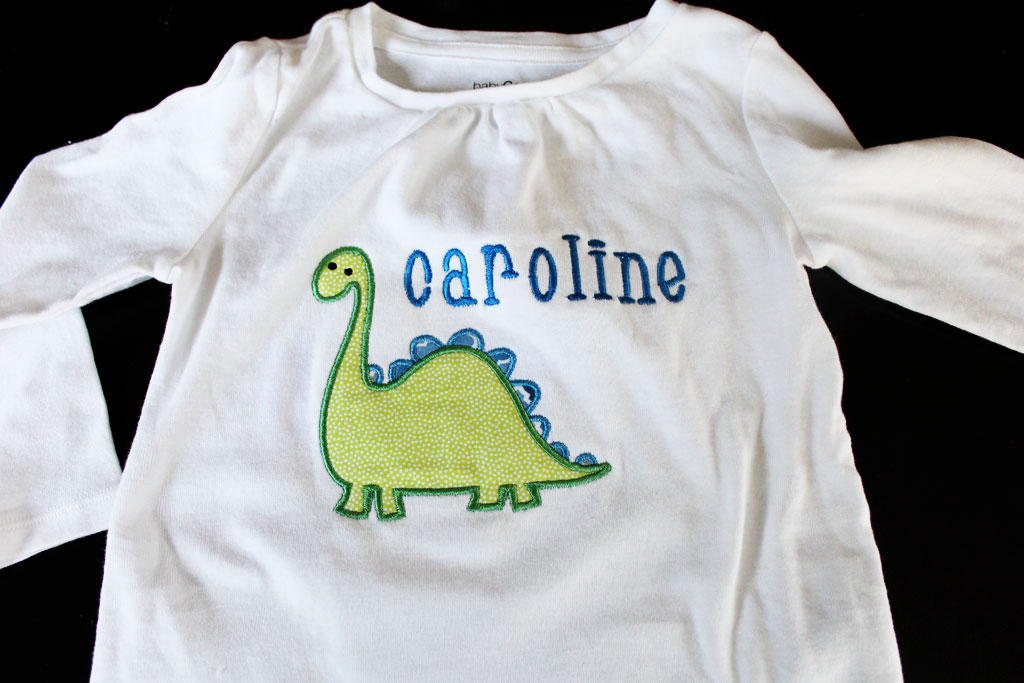
And because I was having so much fun I texted another good friend with a daughter around the same age to ask what her favorite animal was, her answer (as every awesomely imaginative 2 year old is…) was a moose cow.  Well, I couldn’t find any of those on Etsy, but since her mom told me she also loves dinosaurs, I found a super cute brontosaurus to applique for her! (That one is from Applique Cafe Designs on Etsy).

Machine Applique T-shirt | www.amusingmj.com

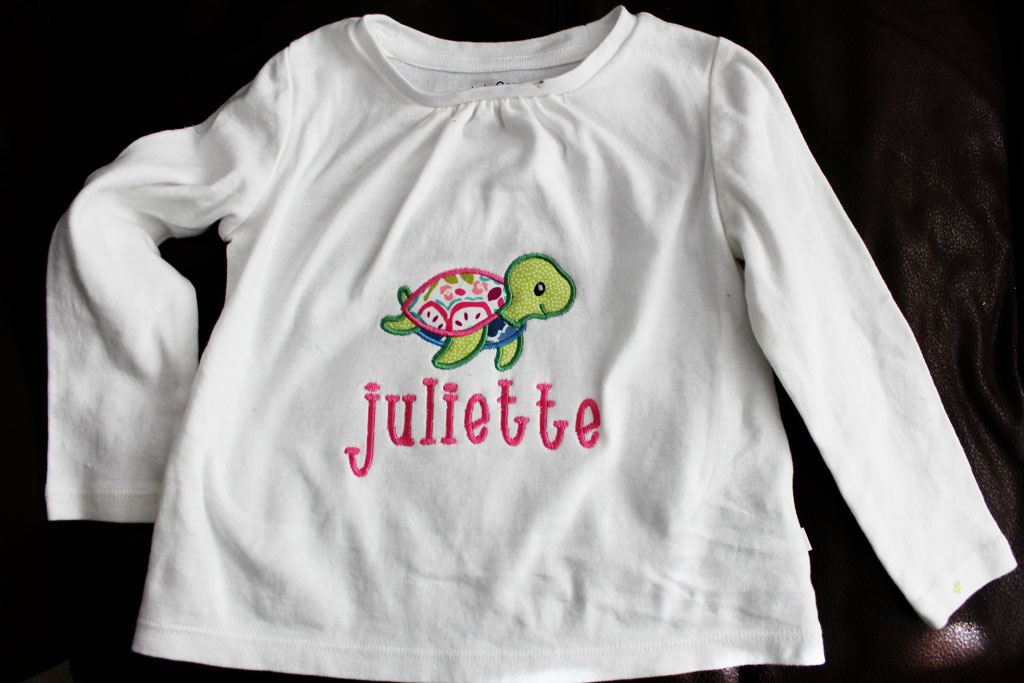
My niece also loves Myrtle the Turtle, so I decided she needed a Sea Turtle on her shirt! This SUPER cute design is also from Rivermill Embroidery and you can find it here.

Machine Applique Tee | www.amusingmj.com

For the shirts, I bought long sleeve playtime favorite tees from Gap Kids when I had a 40% off coupon.  The shirts are a great thickness and when they are 40% they are pretty affordable.  And the great thing about applique is that it is a great use for small pieces of fabric! I got a great video of Juliette opening her present saying… Myrtle Turtle! Right there!!  I love being able to make things for friends and it makes me sort of ridiculously excited to have a project come out this cute!! That feeling? When I see a project come out like it looks in my head? That is why I love to craft and make things!

6 Weeks In…

So we are officially 6 weeks into this parenting gig (or will be tomorrow), and I gotta say… it is one of the craziest experiences of my life.  It is very surreal to make the transition from pregnancy to birth to infancy.  One minute she is poking you in the ribs and constricting your bladder and the next she is a new person in the world, breathing and experiencing everything for the first time.  There are so many things about our first 6 weeks that I don’t want to forget! I blogged about a few of them in her one month update, so this one will focus more on the parenting side of things rather than the baby side of things.

1. Sleep deprivation is no joke. There is a reason they use sleep deprivation as a torture device.  The first few weeks you get virtually no sleep.  I am breastfeeding, so we were told to wake her up every 3 hours to feed (and sometimes she decided it needed to be every 2 hours), and since feeding usually took between 30-45 minutes, and another 30ish minutes to get her to sleep again, you are really looking at getting an hour, maybe an hour and a half, of sleep at a time.  Before baby I needed anywhere from 8-10 hours of sleep a night… and to switch to 4 or 5 one hour stretches at night? Miserable.  Especially because several times when I would lay down to sleep I couldn’t fall asleep!! As a brand new (and totally inexperienced) mom, you are constantly concerned about whether they are breathing, are they sleeping in the right thing, am I doing this right?!!? One of my sorority sisters wrote a piece for the huffington post on the thought process of a new mom… and it is spot on… read it here. I laughed out loud when I read it because I constantly have the thoughts warring in my head between: “look how precious she is… I just love her, I could sit like this forever” and “No No No No… GO BACK TO SLEEP” At 6 weeks she is now sleeping 4-5 hour stretches at night, which feels like HEAVEN (except for the moments where I wake up before her and go… WAIT… she didn’t wake up… is she BREATHING?!!?  Yes… okay, great, now I can go back to sleep… just as soon as this adrenaline rush I just self inflicted passes)

www.amusingmj.com

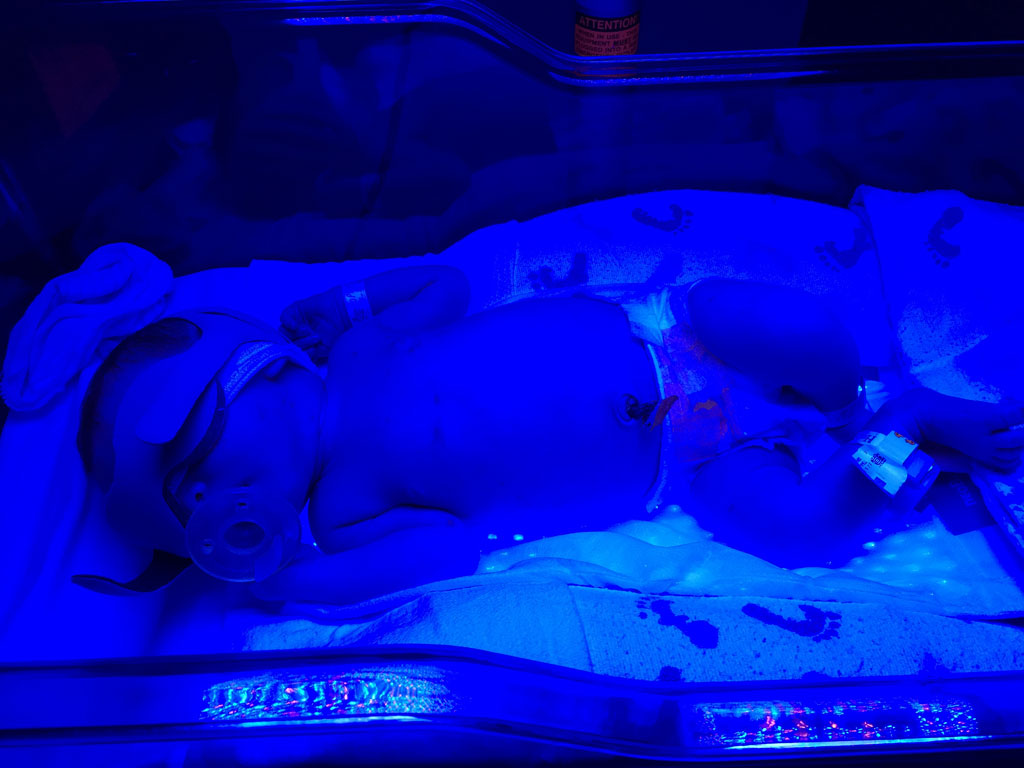
2. Hormones are not your friend. For the first few weeks (okay maybe the first month-ish) you cry uncontrollably for no apparent reason and for good reasons, and for every reason in between.  I was feeling good during pregnancy for not being a crazy emotional person.  I mean… other than crying at a few commercials… I felt pretty steady through most of pregnancy.  Postpartum however?! Different story.  I remember sitting on the couch ugly crying and my sweet husband coming in going… what is wrong? what happened? And I told him exactly the truth… absolutely nothing. I just needed to cry the estrogen out (yes I know… not so medically sound, but that’s what it felt like!). And there was an evening in the hospital where she had lost more weight than they wanted her to and she was getting dehydrated; she wasn’t getting enough milk or colostrum or whatever I was producing.  She was also jaundiced and needed to spend the night under the blue billi lights.  And because she was dehydrated we needed to supplement her food either with donor milk or formula.  And what I heard in all of that information was: You aren’t able to provide for your daughter, so we are going to let someone else provide for her. Rationally I knew that jaundice is a fairly common problem, (which my brothers and I all had) and that the donor milk/formula was a short term solution and what was best for Taylor, but hormones (and sleep deprivation… see #1) prevent you from reacting rationally, so I had a total meltdown in the hospital that included me crying, the nurses tiptoeing around the crazy crying patient.  But after a night of being under the lights, a little bit of donor milk and one thing of formula, I was able to get back to feeding her and she was good to go! (See the picture below to see her stylin’ glasses she had to wear under the billi lights.) The good news? Those even out after not very long and the random crying spurts happen farther and farther apart.

www.amusingmj.com

3. Breastfeeding is HARD.  The hospital we gave birth in has a breastfeeding support group every week, and after attending for several weeks I have come to a few conclusions.  1. at the beginning EVERYONE has a hard time breastfeeding–see the above story.  What I didn’t mention in that one was that despite excruciating pain, I was feeding Taylor (or trying to) every hour up until that point… but to no avail, she still wasn’t getting enough.  Fast forward a few weeks and I am having no problem producing more than enough to feed her (and put some away for when I go back to work) as evidenced by the fact that for the last two weeks she has gained 11 and 12 ounces per week (and only needs to be gaining 5-7 ounces).  But in the hospital I had several lactation people tell me “It isn’t supposed to hurt”.  Well my unscientific research of me and most of my friends says… it hurts like crazy for the first little while, but then once your milk comes in and you and the baby get the hang of it… it doesn’t hurt (as much). But those first few days? I had cuts and bruises and scabs from my little milk monster. I want to go back and tell myself on day two that it is TOTALLY worth it, and just to hang in there (and I kind of want to punch the nurse who told me it should never hurt).

The other piece of breastfeeding is that I am hungry ALL THE TIME.  My poor husband, every time he goes to get something from the pantry? I’ve already eaten it. I have a serious case of the munchies!!

4. She is precious. One of the things I love most is watching her sleep.  She is peaceful and makes crazy facial expressions in her sleep.  She reminds me all at the same time how fragile life is, and how resilient we are.  One of the funnier things in the hospital was her first visit by the pediatrician.  He came to do her first checkup when she was about a day old and he picks her up and checks her out, and kind of tosses her around as he does it.  He pushed on her stomach and put his hands in her mouth, and gave her a thorough exam. But he also did it in a way that intentionally showed us as new and timid parents that she wouldn’t break.

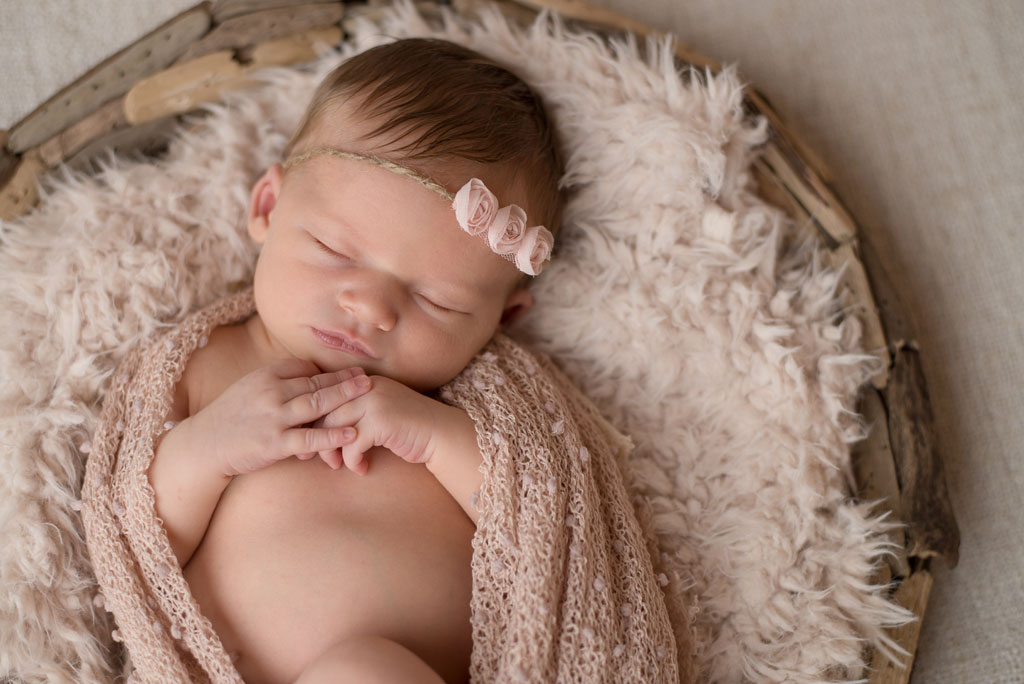
I love how much like a tiny little human she is (I know… you are thinking: she IS a tiny little human).  But it is incredible that we all start out that small and are able to grow into the adult size humans we are. It is sort of amazing.  We got some great photos taken by our friend Alicia and I love how they capture how precious she is! (I’ll post more of them later, but here is one of my favorites

The first 6 weeks of motherhood  | www.amusingmj.com  http://aliciaskinnerphotography.com/


5. They start to have a fun personality: As she gets older I get to see glimpses of her personality emerge.  Her smile is this sort of crooked grin that I can already picture her at age 3 giving us when she does something she isn’t supposed to do.  And much like her mama, I put a super frilly dress on her one day (it was super cute!) and she fussed the whole time, I took it off and put on some comfy clothes and she quieted down! And did I mention she likes to eat? A Lot?!  She gets that from both her parents! But she already likes to play by herself on her play mat and loves to go outside! It will be fun to see if those personality traits stick and what she will be like as she grows up! Plus right now she has blue eyes and light brown hair… but she won’t necessarily get to keep those, so I’m anxious to see what she looks like as she grows up.

Okay, enough new parent rambling.  Needless to say, its true, parenting is simultaneously the hardest and most rewarding thing!